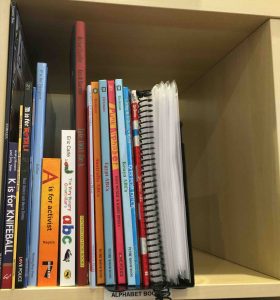
It is currently the summer break in Australia and I’ve had a few emails and messages from teachers who are spending time over the break getting ready for the next school year. Several of these emails have been about alphabet activities and resources – so I thought I’d do a post about my ideas as a starting point – and I hope lots more ideas get shared in the comments below.
I do have to warn you in advance that this is going to be a long blog post – but I wanted to share lots of examples!
Why Letters and Sounds?
It is essential that each student develops their knowledge of letters and sounds along the way to becoming conventionally literate. Hall and Williams (2000) list “letters and sounds” as one of the primary blocks that needs to be focused on in an emergent literacy program. Letters and sounds are both mentioned because students need to develop their letter knowledge so that when they move onto words, they already have the letters under their belt (Adams, 1990). If they are learning to read the days of the week, one of the things that they can use to differentiate Monday from the other words, is the beginning letter – “it’s the one that starts with M”. Letter knowledge is often one of the earliest skills that students use in recognising and writing unfamiliar words. “Letters and sounds” are often listed together because as well as learning the letters, students also need to develop the alphabetic principle. They need to understand the different sounds that individual letters and groups of letters can make – and use this alphabetic principle to begin to spell words and to decode words.
In terms of helping students to learn the alphabet we are often recommended to do activities such as these:
- Read alphabet books
- Point out letters and print in the environment
- Talk about letters and their sounds when you encounter them in every day activities
- Provide opportunities to play with letter shapes and sounds
- Explicitly reference letter names and sounds in shared reading and writing activities
- Use mnemonics and actions
- Use student NAMES!
(Koppenhaver, Clendon and Farrall, 2012)
The dot point that I get the most questions about is “providing opportunities to play with letter shapes and sounds” – so I’m going to spend the majority of this post focusing there. However, I also want to discuss how we make sure we cover the alphabet with our students. I know that many schools and classrooms do a “Letter of the Week” approach – and in fact I wrote a blog post about this a few years ago. However, focusing on a single letter for a week isn’t the best approach (as I’ve learned since I wrote that blog post). We definitely want to see immersion in the whole alphabet during some activities – and this is currently the most recommended approach to learning the alphabet. However, many of the teachers I work with find it useful to have some focus letters for each week – this helps them make sure that they cover the whole alphabet and that each letter gets some attention. They might focus on anything between two and six letters each week. It is important that at least two letters are covered at any time though. If we use a letter of the week approach, it becomes too easy for students to answer questions such as “which letter does bus start with?” – because obviously it will be the letter of the week, “b”. Having two letters as our focus means that students need to make a decision, and that extra thinking about letters helps them to learn them! In addition, having two letters gives students a chance to compare and contrast. It actually makes it easier to learn what “b” looks like when you can compare it to “s” – and we’ve seen much faster progress in classrooms that have moved to multiple letters of focus each week.
Now – onto that dot point!
Providing Opportunities to Play with Letter Shapes and Sounds
Many of the teachers that I work with schedule regular times for this to happen – but find it easy to get stuck doing the same set of activities again and again. The best thing to do, I’ve found, is to have a repertoire of resources, many of which will only be used for a few minutes, but which can be used throughout the term. As we use them, we talk about the letter and the sounds it makes, particularly focusing on the most common sounds. Here are some of my favourites:
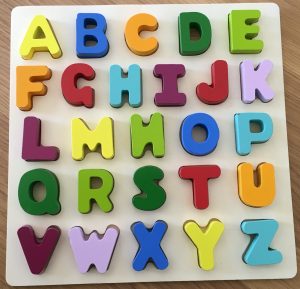
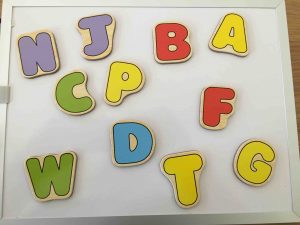
Alphabet jigsaws – there are lots of these available. Below is a very simple one from KMart that I like because it makes the shapes of the letters very clear. However, a search on Pinterest shows that there are hundreds of different ones available – and many of them are in themes such as animals, transport, etc. Most of them are A-Z but there are some that only focus on one letter or a smaller group of letters. As an example, there’s a nice set on Teachers Pay Teachers from Tanya Sisseck that has four piece jigsaws for every letter of the alphabet.
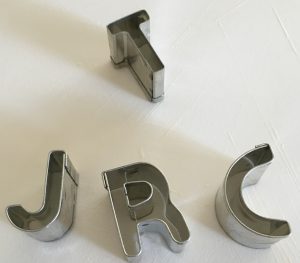
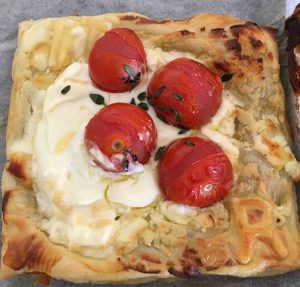
Cookie cutters – I got my alphabet biscuit (cookie) cutters a long time ago as a present – but they are available from many different shops. Towards the end of the school year, I was working with a classroom that was making tomato tarts out of puff pastry, ricotta and cherry tomatoes. Since they were making tomato tarts, we cut lots of T’s out of the left over pastry. Then we cut each student’s initial and put them on the tomato tarts. The students also wanted to cook the piece we cut the letters out of – so we did. Each tart was decorated with two Ts for tomato tart and the first letter of their first name. The cooking was the main focus – but we can wedge a bit of alphabet into anything 😉 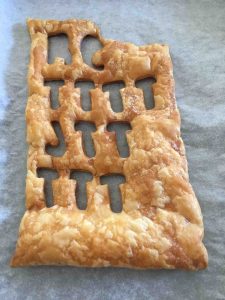
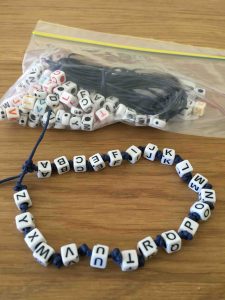
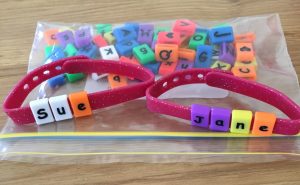
Alphabet Beads – these are available in lots of different kinds and configurations. I can make up a bead bracelet with a student’s name on it, or a necklace for the letters we are focusing on this week, or an A – Z chain as decoration – whatever the situation requires 🙂
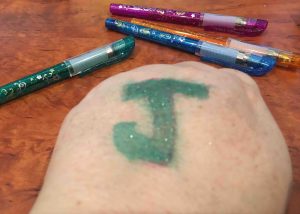
Tattoo gel and face/body paints – it’s been a great hit in several classrooms to decorate each students’ hands or arms with two letters of the week. You can use face and body paint or tattoo gel. The tattoo gel has been more popular with some students because of the extra glitter factor but it is definitely harder to wash off!
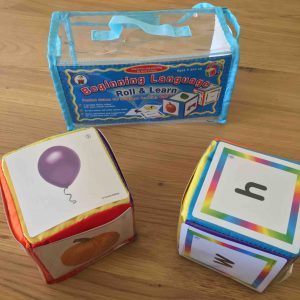
Dice/Cubes – I love my pocket cubes. I used to make my own large dice out of cardboard but I was always re-making them. These have been durable, light and easy to handle. I have a range of cards with different letters on them, and then cards with different pictures, starting with different sounds. We use them in different ways – rolling for alphabet hopscotch, playing AAC alphabet, brainstorming words that start with the letter, finding objects in the room that start with the letter, etc. Lots of short, fun games – many of which are good alphabet packed action breaks.
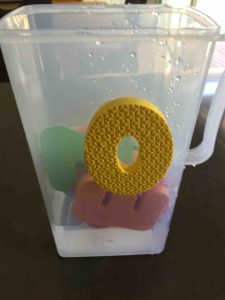
Bath letters – these are great for water play on a hot afternoon. I like the way they stick to containers – so we can have a letter hunt and then put the letters we’ve found aside. Bath letters are available in lots of different stores.
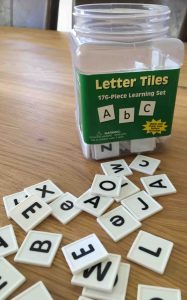
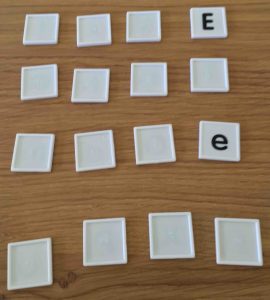
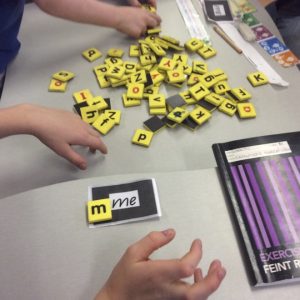
Letter tiles – there are lots of options for letter tiles. I have a 176 piece tub from Amazon – it covers upper and lower case and has multiples of different letters. Versatile for sticking onto things with blue tack, sorting, organising and playing memory (middle photo). The third photo below is from a classroom at Willans Hill. The conventional students are doing word wall activities, and the emergent students are finding the initial letters of each word from a pile of letter tiles. This is a great activity to help students learn to discriminate letters from each other. I have also done this by putting all the letter tiles on the table, recording letters to find on a Step-by-Step Communicator and then getting them to make two piles – letters we need and letter we don’t need. The conventional students then use the “letters we need” for Making Words. There are so many things you can do with these!
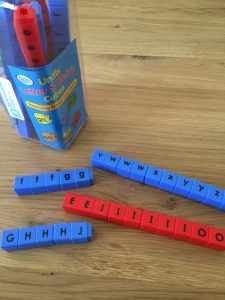
Letter cubes – letter cubes can be used for some of the same activities as letter tiles but have the added advantage of clicking together. So a student can make a tower composed of a specific group of letters, etc.
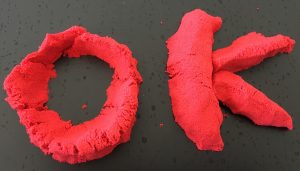
Making the letters – out of clay, pastry, play-dough, mud, kinetic sand….
Alphabet songs – there are hundreds of these on YouTube and other sites. My favourite “all age” alphabet songs are:
Each of these have different pros and cons – speed, graphics, explicit use of letter names and sounds – but they are all engaging and popular!
Letter sorts – these can be two kinds: visual and auditory. In a visual letter sort, the students sort them visually! Lorna from Adelaide West Special Education Centre did a fabulous visual letter sort one day when I was in her classroom. She tied the two letters she was focusing on that week out in the playground. For an activity break, her students had to collect them from the playground. As they found them, they came back to the door and put them into one of two containers – each of which was labelled with one of the two letters. The students loved the activity and it really engaged them in thinking about the letters as they sorted them. Another favourite of mine is to put large letters at two ends of a space – a room or a playground. I then ask the students to run to the letters – I might do it verbally or write them on my mini whiteboard.
We can also do visual word sorts where the focus is on the first letter – this is a great task for many students to teach them that words are made of letters and to pay attention to the features of words.
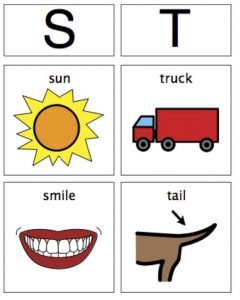
Click here to download the files of cards that I’ve made to use for visual word sorts.
And finally, auditory sorts. Auditory sorts are done by saying a word (usually accompanied by a picture) and getting the student to determine which sound it starts with. When using pictures, you can get the student to say the word (verbally or using voice output) and then determine which sound starts the word. Below is a photo of a student doing an auditory word sort on a SmartBoard at Willans Hill School. Auditory word sorts are great for encouraging a student to really listen to the sounds at the beginning of words.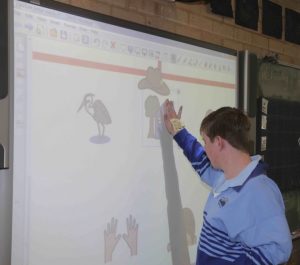
Click here to download files of cards that I’ve made to use for auditory word sorts (no text allowed).
Lakeshore has a commercial kit you can buy for auditory sorts – the Lakeshore Letter Sound Matching kit.
Light Up Letters – several stores are now selling light up letters. They are designed to be decorated – covered with paint or glitter etc. They are a wonderful way to explore, experience and discuss the shape of a letter. Kmart is one of the stores selling these.
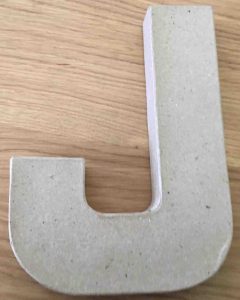
Large Papier Mache Letters – I love the large papier mache letters that are also for sale at several stores. Again, these are perfect for decorating and learning about the letter shapes. Great hands-on activity.
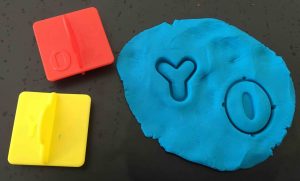
Dough stamps – again these are available at lots of different stores. I’ve bought cheap ones at dollar stores and the official PlayDoh ones (shown in the photo below). I like having several different sorts – ones that are shaped like the letters and ones which are labelled by the letters. The Lakeshore Stampers are more suitable for some students because of the nice long handle they have on them.
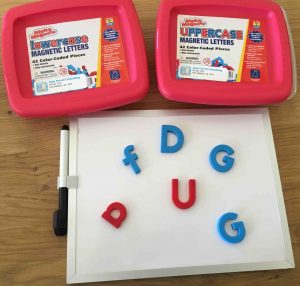
Magnetic letters – great fun to play with! Again – I have several different sorts. It’s good to have a mix of both uppercase and lowercase and different fonts as well.
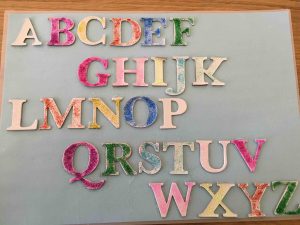
A – Z Posters and Sheets – it’s great to have a range of these. I like them interactive – so I buy wooden letters and make my own pull off versions – with tracings of the letters sometimes on the board so that they can be put back. Sometimes, though, I just make them with dots of velcro – more challenging for the student to put them back. It’s a great chance to interact with the alphabet. The picture below is of one I made with my nephew. I gave him a pile of cardboard letters and he coloured them in using glitter glue – then we stuck them on a laminated sheet. You can make lots of varied ones – and decorate and adorn them as you see fit, as well as buying commercial ones.
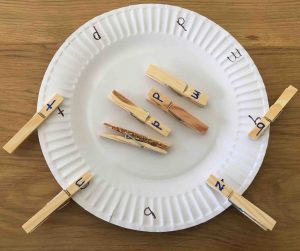
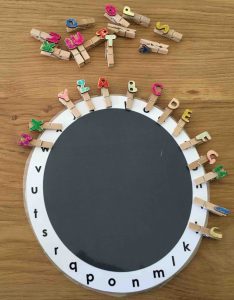
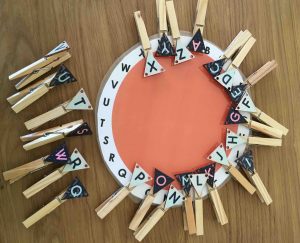
Pegs – I have different alphabet pegs. You’ll see them all in the photos under alphabet wheels. One set are mini pegs that came with the alphabet already attached – and I just painted them. The other sets are full size pegs. For one of them I simply wrote the letters on the pegs with a permanent marker. The other set has wooden alphabet flags stuck on them. I use them for a range of activities – marking pages in a book to ask a student to “turn to B”, alphabet wheels, pegging students’ clothing as they take it off, especially if it isn’t labelled already, and so on. They are yet another tool to embed the alphabet through lots of different daily tasks.
Below are a couple of photos I’ve collected in classrooms. The first one is from Kate at The Grove Education Centre. She had strips for helping students make upper and lower case letter connections. She made up strips with lower case letters and stuck foam letters on wooden pegs to make this up.
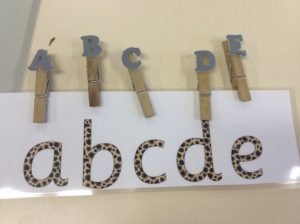
The next one is from Malibu School – but they are an online resource that the teacher printed and can’t find the link for. (If you know it – please tell me!). Again these focus on upper and lower case connections. The pegs in this activity are just plain ones 🙂
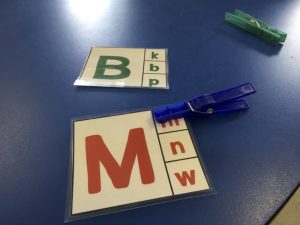
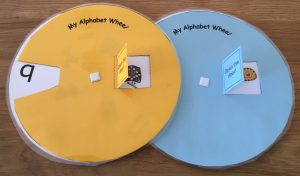
Letter and Sound Wheels – there are lots and lots of templates for letter and sound wheels online or you can make your own from scratch. They tend to have different purposes.
This first one is a quick and dirty one I made up for a student who was still consolidating some letters of the alphabet. I wrote letters on a paper plate and used my handwritten alphabet pegs – and he had to match them. Then we did the task again with plain pegs – where I called out the letter and he had to peg the right letter.
The second ones are “posher” – I made them up, laminated them and reuse them. One of them has lower case letters and the other has upper case letters. Students can then practice their upper case / lower case pairings with lower case or upper case alphabet pegs. Click here to download the Word documents to make your own wheels.
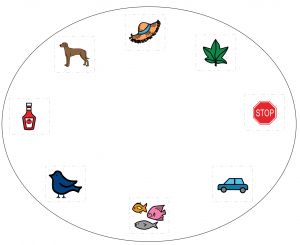
And finally, we have letter and sound wheels. These are usually picture based wheels – where the student pegs the picture with the appropriate peg for the initial sound, such as the one below. (Click here to download the wheel below)
Or (like the ones pictured below) a wheel with a letter and a picture window. The picture starts with the appropriate letter for a nice letter-sound activity. I downloaded these online from this link and made them up.
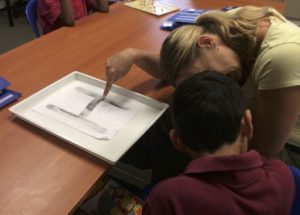
Tracing letters – trace the letters on a table or bench or a perspex screen in shaving foam or flour or paint. You don’t necessarily have to have the letter there to trace – just draw it freehand. There are lots of pictures of all of these on Google. One teacher I worked with, the wonderful Tammy from The Grove Education Centre, had students with different allergies, sensory needs etc – and came up with a great idea that all of her students could engage with – which was putting the letter on the bottom of a tray and covering it with salt.
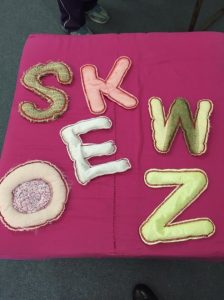
Wheat Bag Letters – Ayko from Malkara School is the creative teacher who made these. She sewed them herself (which I believe involves something to do with needles). Malkara is in Canberra and the climate goes from very hot to very cold (for Australia). In summer, Ayko puts them in the freezer and then the students can hold them and interact with them. In winter, she microwaves them so they are nice and warm – and the same applies. A great quick activity.
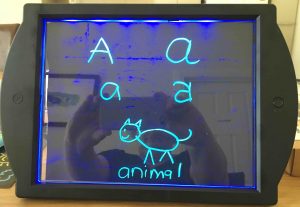
Whiteboards, Noticeboards, Light-up boards, LED Writing boards, Blackboards – All of these are great tools to have in your toolkit. I frequently walk around with a small, portable whiteboard that I can use to convert speech to text. I can use it to write a quick message to a student, write some letters, etc.
Light-Up Drawing Boards and LED Writing Boards are great for students with cortical vision impairment. High contrast and bright!
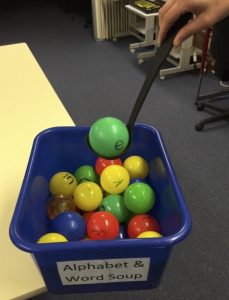
ABC Fish and Alphabet Soup – ABC Fish is one of my home-made activities. I bought some cheap fishing games at a Dollar Shop, a couple of packets of ping pong balls and used some magnets and magnetic tape I already had at home. I wrote the letters of the alphabet on the ping pong balls, stuck magnetic tape on them and on the fish included in the original pack, put it all in a plastic container and called it ABC fish. Lots of fun – and great opportunities to interact with the letters and talk about their sounds.

The amazing Amanda from Willans Hill made a similar activity on a bigger scale and called it alphabet soup. Instead of fishing rods she has a ladle 🙂
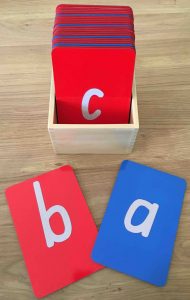
Tactile Letters – there are different raised or tactile letters available. There are Feely Fabric Letters, Squidgy Sparkle Letters and Tactile Letters. I have a set of Montessori sandpaper letters which have been really durable and are available in both lower and upper case. There are also instructions online for making your own sandpaper letters.
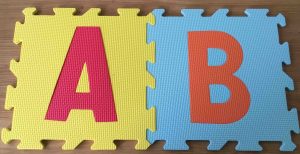
Foam letters – foam letters are available in so many sizes and types. Magnetic, stickers, plain, etc. One of my favourites is those large alphabet foam mats – you can pull them apart, pull the letters out, feel the letters, put them back in, make the mat, talk about the letter sounds, etc. Another great hands-on activity (or set of activities).
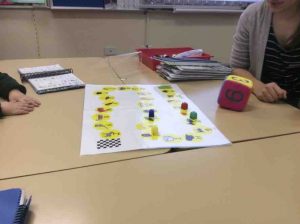
Alphabet AAC – this is an activity made by the wonderful Kim at Malibu School. Students roll a dice, move their piece, and then once they land on a letter they look for a word that starts with it in their AAC system. They love playing it!
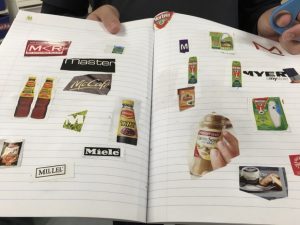
Alphabet Scrapbooking – Jess at Willans Hill set her emergent students a task of working through magazines and finding pictures or logos that started with different letters. Over the year they turned these into their alphabet scrapbooks. They could add to pages, look back and talk about them and use them as a resource in other activities.
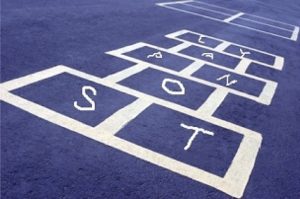
Alphabet Hopscotch – I first saw this in Heather’s classroom at Para Meadows School. They played it in different ways. One option was to use a pocket cube setup with the same letters – students had to jump onto the letter thrown on the cube. The caller would have to name the letter. In another version, the caller would simply name a letter and the student would have to jump onto it. While I was in the classroom they also played this via auditory scanning with a student in a wheelchair.
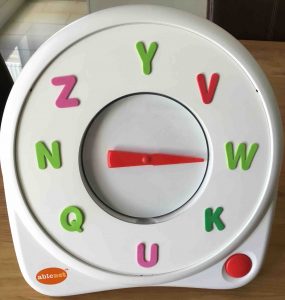
All-Turn-It Spinner – the All-Turn-It Spinner is another great and versatile tool. It has the added advantage of being switch accessible as well as direct access. You could use it to play a range of alphabet games including the alphabet hopscotch above or to call out letters to run to. I made the overlay up with some of those ubiquitous alphabet foam stickers.
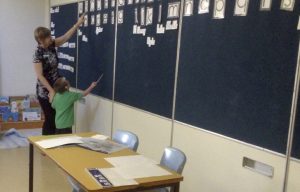
Name wall – we shouldn’t use a word wall with emergent students as they aren’t yet ready to move onto word activities. Hall and Williams (2000) suggest using a name wall instead. It is formatted in a similar way to a Word Wall but only has the students’ names on it. The wall becomes a great alphabet teaching and learning tool and also provides a focus on student names and lots of opportunities to talk about the letters in the names. Below is a photo of Charmaine’s name wall from Malkara School.
Name trail – I saw this in Peter’s classroom at Willans Hill. Peter is an amazing teacher and wedges so much into every day in his classroom. The name trail was made with tape on the floor inside the classroom door. Each time his class had to line up at the door, they had to find their name on the tape. Peter changed the position of the names regularly to keep them on their toes.

Letter boxes and bags – teachers have long used letter bags and/or boxes in teaching the alphabet. Rachel Dougherty, one of the amazing Master Teachers in Brisbane, has fabulous literacy trolley. One of the items on her trolley is a series of bags – one for each letter of the alphabet, each containing pictures of objects that start with the letter. It’s a great way to be able to pull out appropriate pictures as needed.

Below is a photo of a letter box that I took in a classroom (I have forgotten which classroom – so please let me know if it is yours). This classroom is obviously doing the letters M and O and all of the objects in the box start with those letters. This lets them do auditory sorts and get really hands on 🙂

Single Letter Cards and Shapes – I copied this idea from the amazing Amanda at Willans Hill. Amanda has a display of alphabet bags in her classroom as shown in the picture below.
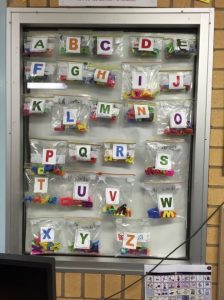 Inside each bag are a mixture of plastic letters, magnetic letters, wooden letters and foam letters in both upper and lower cases. I copied her idea but I also made up lots of letter cards in my kit – and to better meet my needs, my kit is stored in a box rather than on the wall (see below).
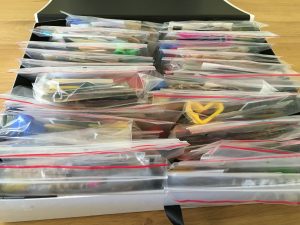
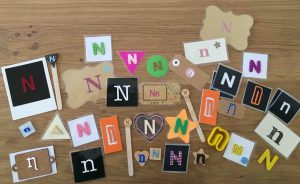
Every year I have a discussion with at least one teacher or parent who tells me that one of their students knows the alphabet as long as they use specific alphabet cards or a specific font. We need to avoid this and make sure that we make resources in different fonts, different sizes and that we don’t always use the one set of cards. So – I have made up several different sets of cards, some upper and lower case, in different fonts and at different sizes. Below are the contents of my letter N bag. This will definitely ensure that a student doesn’t exhibit skills with only one specific set of cards!
Finger Spelling and Braille – Don’t forget to accompany your alphabet activities with the fingerspelled alphabet or with Braille, if appropriate. If you are supporting a student who is learning Braille or who is using Braille to build their Concepts about Print, I highly recommended a hand-held Brailler if you don’t have access to another Braille printer.
Apps – I’m not going to talk much about apps in this post. I’ll aim to do a separate post on apps sometime in the future! However, please remember that apps don’t give students the opportunity to go hands on and learn the shapes of the letters by feeling them. They are a great addition to all the different alphabet activities we do but should never be the only activity.
And finally – please remember that you are an important component of nearly all of the activities I have mentioned. You can talk about the letters and sounds during the activities, make print-to-meaning links for students and help them to focus, learn and consolidate. Your role is really important in each student’s learning. If a student can do an activity independently we need make sure we are clear on what it is teaching them and what their goals are. For students to learn we have to teach – and for them to continue to learn and to be engaged we need to constantly evaluate and change goals, materials and resources.
And please, please share your ideas and thoughts on letter and sound activities in the comments below.
Happy Alphabet-ting!

Amanda Hartmann
jane
Rachel Dougherty
jane
jane
Adina Leigh
jane
Lin Burger
jane
Keren Hayes
jane
Chrissie Vlahos
jane
Joanne
jane
GLORIA
jane
Shirley Primeau
jane
Rachel
jane
Pingback: Arts and Phonics
Andrew Stokes
jane